How to Create Professional Passport Size Photos at Home for Free
Parth Soni
Editorial Team
At a Glance
Learn how to create compliant passport size photos online for free. This guide covers international standards, professional tips, and a step-by-step tutorial.
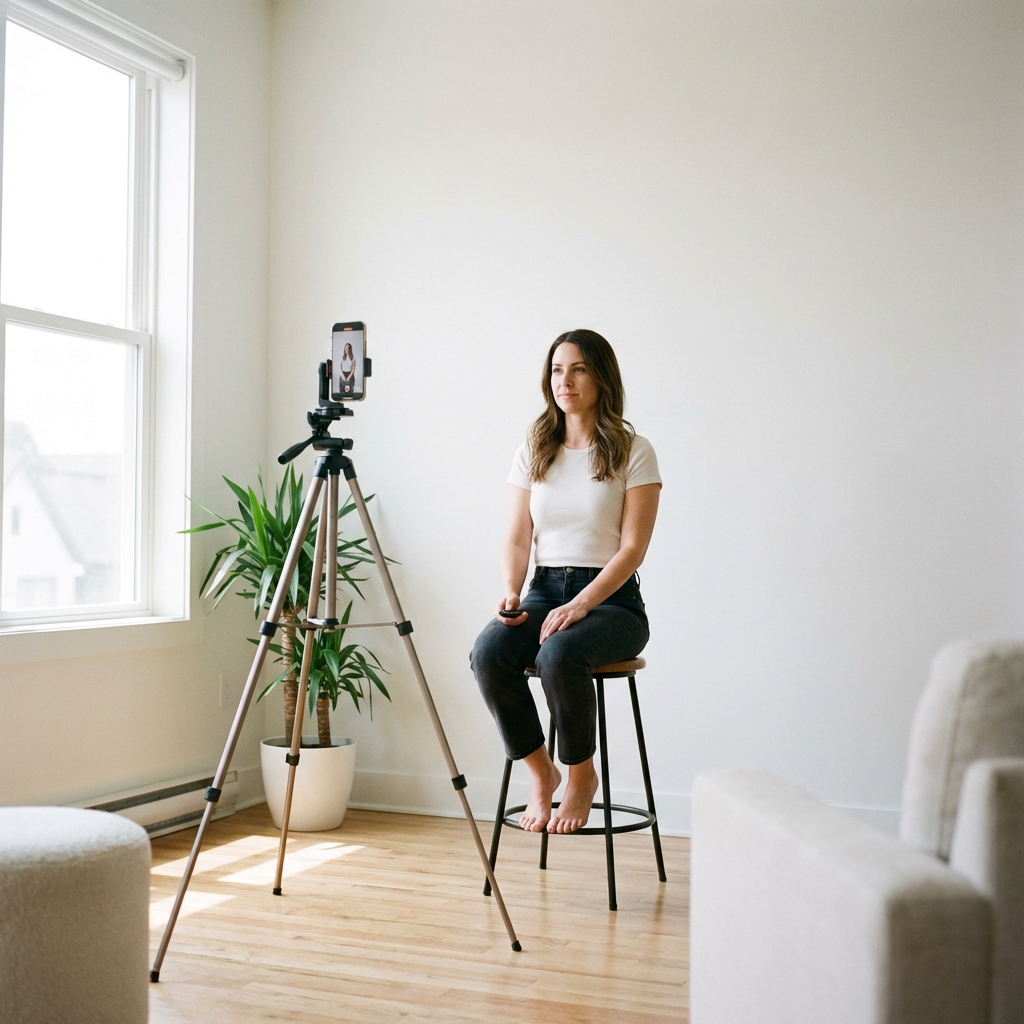
Skip the $15 drugstore trip and the long studio queues. In today's digital era, you can create professional passport photos at home for free using nothing more than your smartphone and our smart browser-based tools.
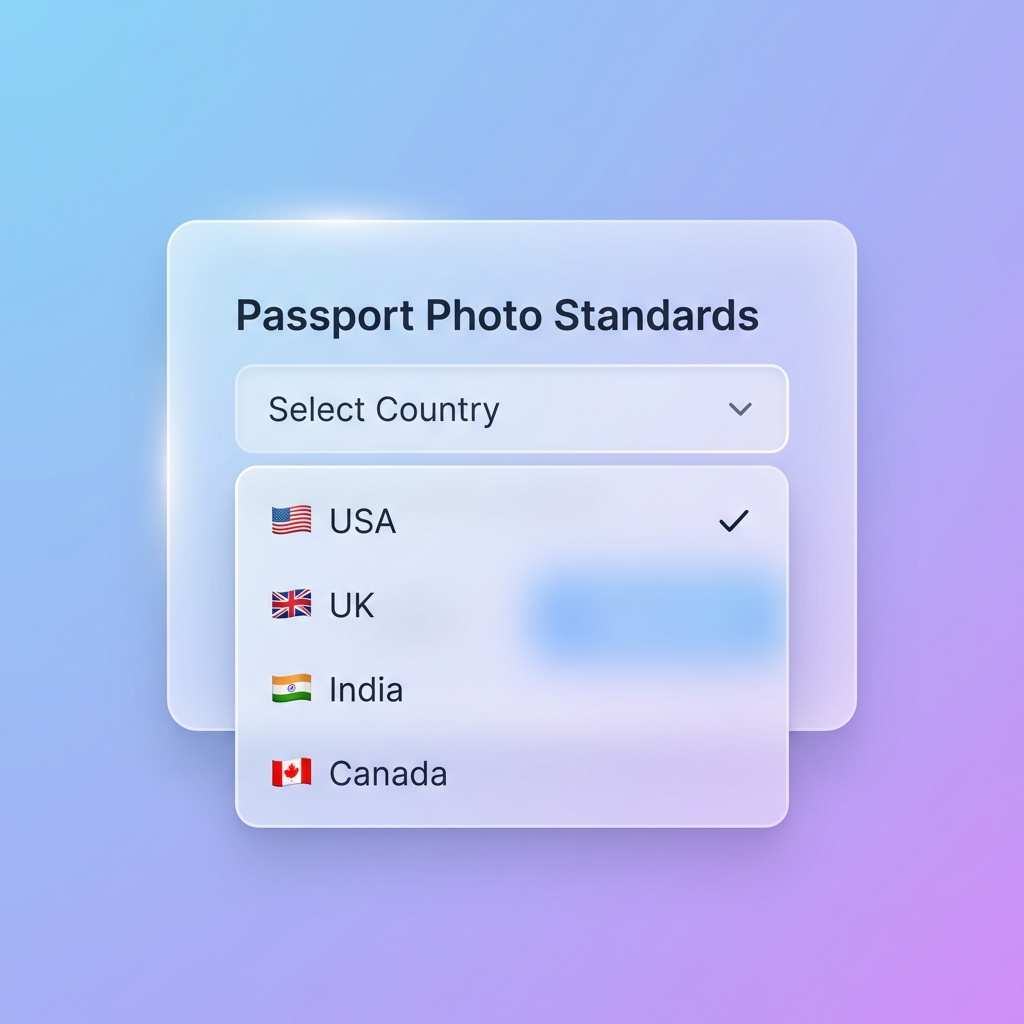
Global Standard Requirements
While specific dimensions vary by country, certain core standards are universal. Meeting these criteria is non-negotiable for a successful application.
US Standard
2 x 2 inches (51 x 51 mm). White background only.
UK / EU Standard
35 x 45 mm. Off-white or light grey background.
Indian / Asian
35 x 45 mm or 35 x 35 mm. High contrast background.
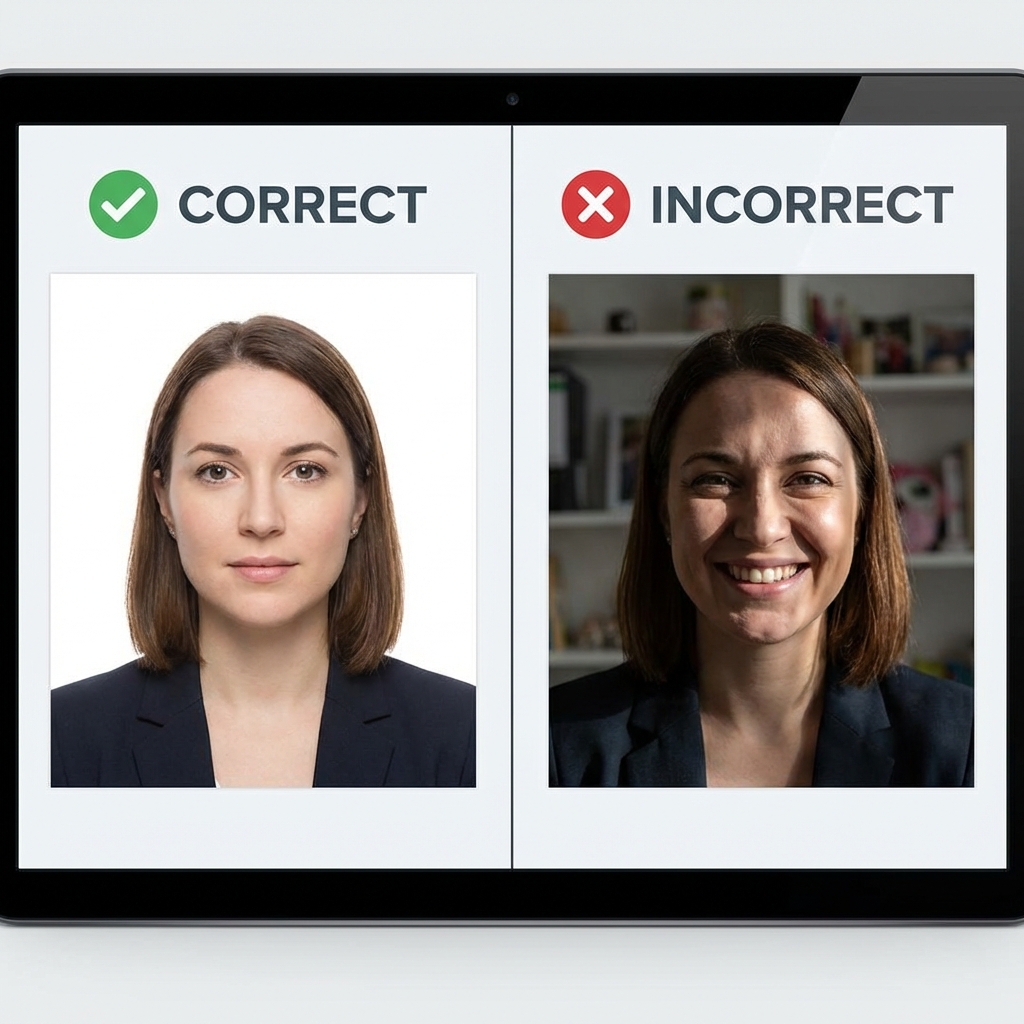
The "Golden Rules" for Home Photography
Success starts before you even open an editing tool. Follow these three lighting and positioning rules to avoid the most common rejection reasons.
Natural Top-Down Lighting
Face a window directly. Natural light fills shadows and ensures accurate skin tones.
Neutral Expression
Eyes open, mouth closed. A natural, neutral face is mandatory for biometric scanning.
Camera Distance
Keep the camera 4-6 feet away. Use 2x zoom to avoid wide-angle facial distortion.
Rejection Pitfalls
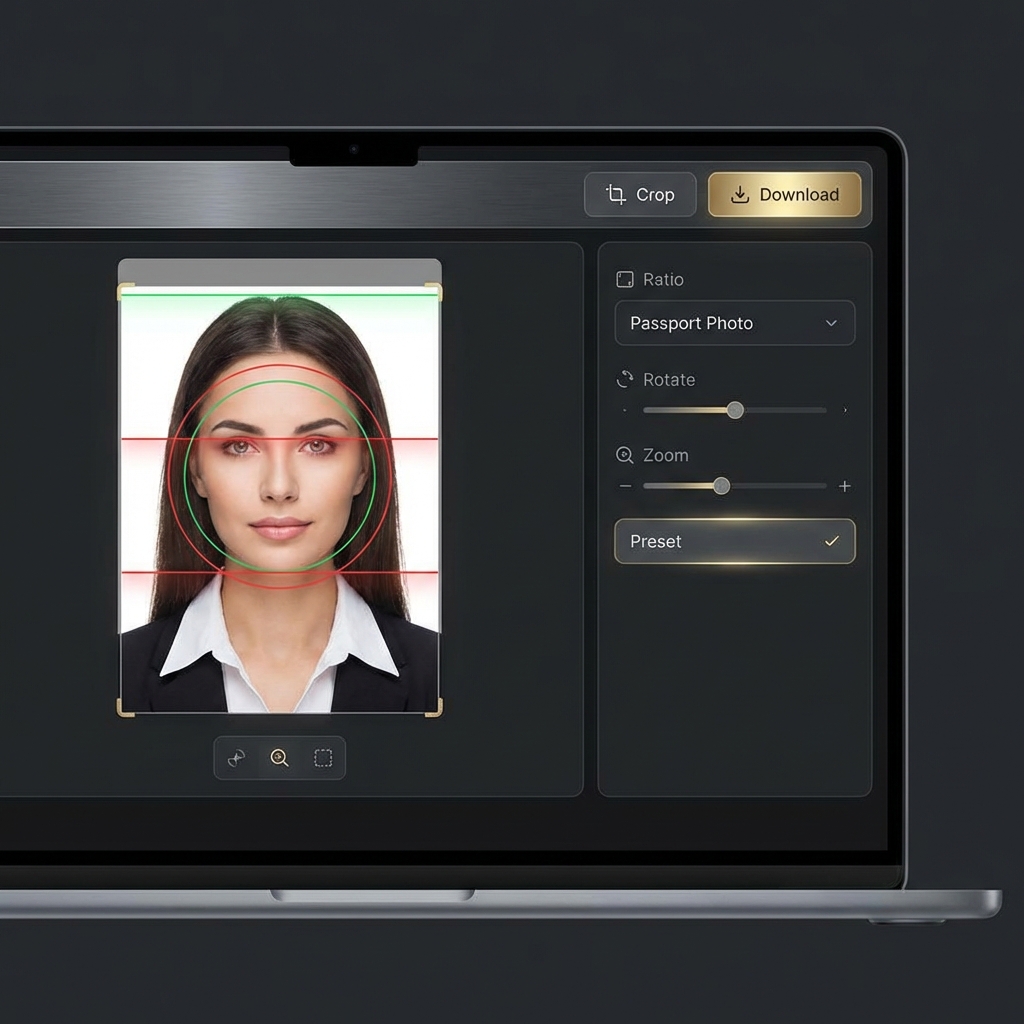
Step-by-Step Tool Walkthrough
Once you have your source photo, Editobox guides you through the technical transformation in under 60 seconds.
Upload Your Photo
Import your headshot. Natural lighting is key.
AI Processing
Our AI strips background and adjusts lighting.
Final Alignment
Choose country size and download.
Frequently Asked Questions
Q1Can I take my own passport photo with a phone?
Yes, modern smartphones have high-quality cameras that are more than sufficient. The key is proper lighting and positioning, not the camera itself.
Q2What is the most common reason for passport photo rejection?
Poor lighting causing shadows on the face or background is the #1 reason for rejection. Always face a natural light source like a window.
Q3Does Editobox save my uploaded photos?
No. Editobox processes all images locally in your browser using client-side technology. Your private photos never leave your device.
Conclusion
Creating a compliant passport photo at home is a straightforward combination of good lighting and the right digital tools. By following official standards and using a dedicated creator, you ensure your application process is smooth and rejection-free.
Need a compliant photo right now?
Try our AI-powered passport photo maker and get your submission-ready images in seconds.
Start Passport MakerParth Soni
Lead Developer & Tool Expert
Parth is the lead developer at Editobox with over 8 years of experience in digital imaging and document processing systems.
Think this guide could help someone else?
Spread the knowledge. Sharing takes seconds and helps us keep our tools free forever.